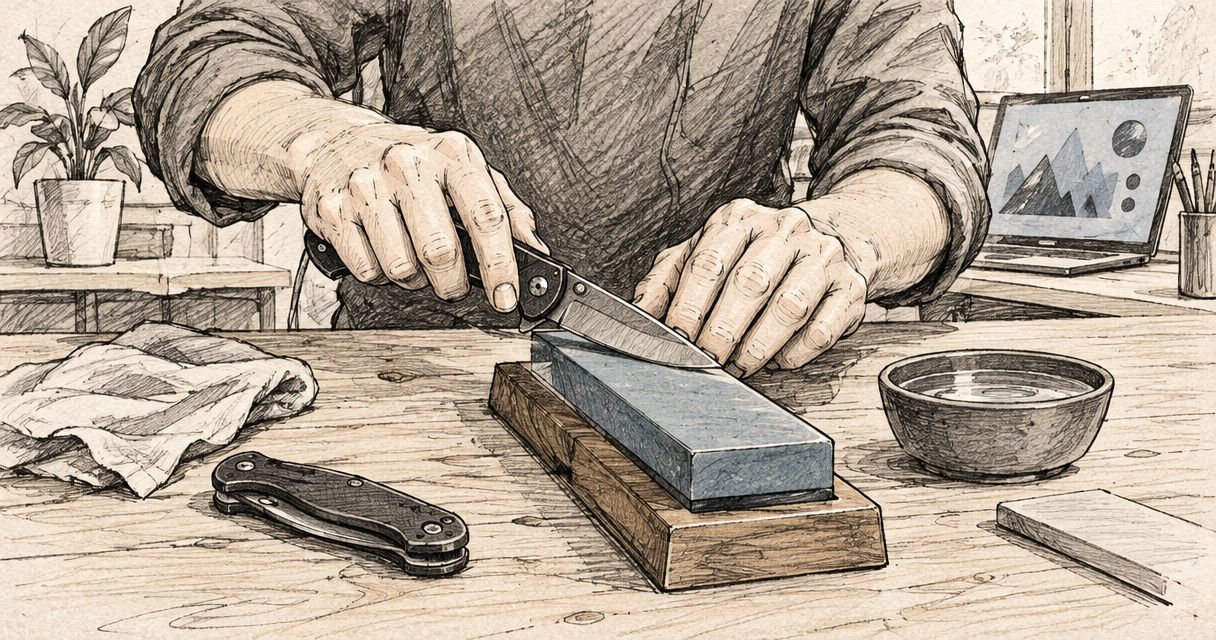
Sharpen a Ganzo folding knife at home by securing the open blade, matching its existing edge bevel on a suitable sharpening stone, and working until you form and then remove a burr. Keep abrasive debris out of the pivot, use light pressure, and stop if the blade moves unexpectedly or the edge has damage beyond routine sharpening.
- Learning how to sharpen a Ganzo folding knife at home starts with matching the existing bevel, not guessing an angle.
- Use a stable sharpening surface, light pressure and a marker to check where the abrasive contacts the edge.
- A burr confirms that sharpening has reached the cutting edge; removing it completes the job.
- Keep fingers outside the blade path, protect the pivot from debris and test on paper rather than skin.
Why this matters
A consistent angle matters more than a polished finish. Rocking the blade changes where the stone removes metal, so you can spend time sharpening without improving the cutting edge.
A folding knife also needs attention around its hinge and locking mechanism. If you cannot identify how to secure your particular knife safely, contact TorchSA before starting rather than assuming every folder works the same way.
How do you sharpen a Ganzo folding knife at home?
Follow this sequence for an undamaged, plain cutting edge. Serrations, broken tips, deep chips and unreliable locks need a different approach.
1. Inspect and clean the knife
Open the knife carefully and identify its locking mechanism, if fitted. Check for unexpected blade movement, visible cracks, major chips or a loose handle; sharpening does not fix these faults.
Clean dirt and sticky residue off the blade, then dry it. Keep your fingers away from the cutting edge and avoid flooding the pivot with cleaning liquid.
Do not sharpen a folder with an unreliable lock or uncontrolled blade movement. Set it aside for assessment instead.
2. Make the sharpening surface stable
Place the stone in a secure holder on a firm workbench. Clear away loose objects and arrange the blade path so that neither your supporting hand nor your body sits in front of the edge.
Prepare the abrasive according to its instructions. Some stones require water, some use oil and some sharpening surfaces work dry; do not assume the same preparation suits every material.
Use good lighting. You need to see the bevel and the tip without leaning your face close to the blade.
3. Match the existing bevel
Colour the narrow edge bevel with a marker, keeping ink away from the pivot. Make a light trial pass, then inspect where the abrasive removed the ink.
- Ink removed near the shoulder: the blade is held too low to reach the cutting edge.
- Ink removed only at the very edge: the blade is held higher than the existing bevel.
- Ink removed across the bevel: the sharpening surface is following the existing bevel more closely.
Adjust gradually rather than chasing a guessed factory angle. Repeat the check along the blade because contact can change as you approach the curved tip.
4. Sharpen until you reach the edge
Use controlled strokes that follow the sharpening system's instructions. Maintain the same angle and work across the full cutting length without scraping the handle against the abrasive.
As the abrasive reaches the edge, it can push a fine lip of metal onto the opposite side. This is the burr. Inspect it under good light; do not run a finger along the blade to find it.
Work only until you establish that sharpening has reached the edge along the section you are treating. A large burr is not a better result: it means more displaced metal to remove.
5. Work the opposite side
Repeat the process on the other bevel while maintaining its existing angle. Inspect the edge frequently rather than relying on a fixed stroke count.
Equal stroke counts do not guarantee equal metal removal. Pressure, abrasive contact and the edge's starting condition all affect the result.
Keep the tip supported as you follow the curve. Avoid rolling the knife over the end of the stone, which can round the point.
6. Refine and remove the burr
If the edge needs refinement, move to a finer abrasive compatible with your sharpening setup. Maintain the bevel angle and reduce pressure as the edge improves.
Finish with light, controlled alternating passes according to the system's instructions. The aim is to remove the remaining burr, not bend it repeatedly from side to side.
A strop is optional. Use it with the edge trailing, so the blade moves away from its cutting edge rather than slicing into the stropping material.
7. Clean, test and store
Remove abrasive residue from the blade without pushing it towards the pivot. Dry the knife and follow its care instructions for any lubrication.
Test the edge by making a controlled cut through paper, with your supporting hand clear of the cutting path. Snagging in the same place repeatedly signals an area that needs inspection; it does not automatically mean the entire blade needs coarser sharpening.
Clean away test debris before closing the knife carefully. Store it where children cannot access it.
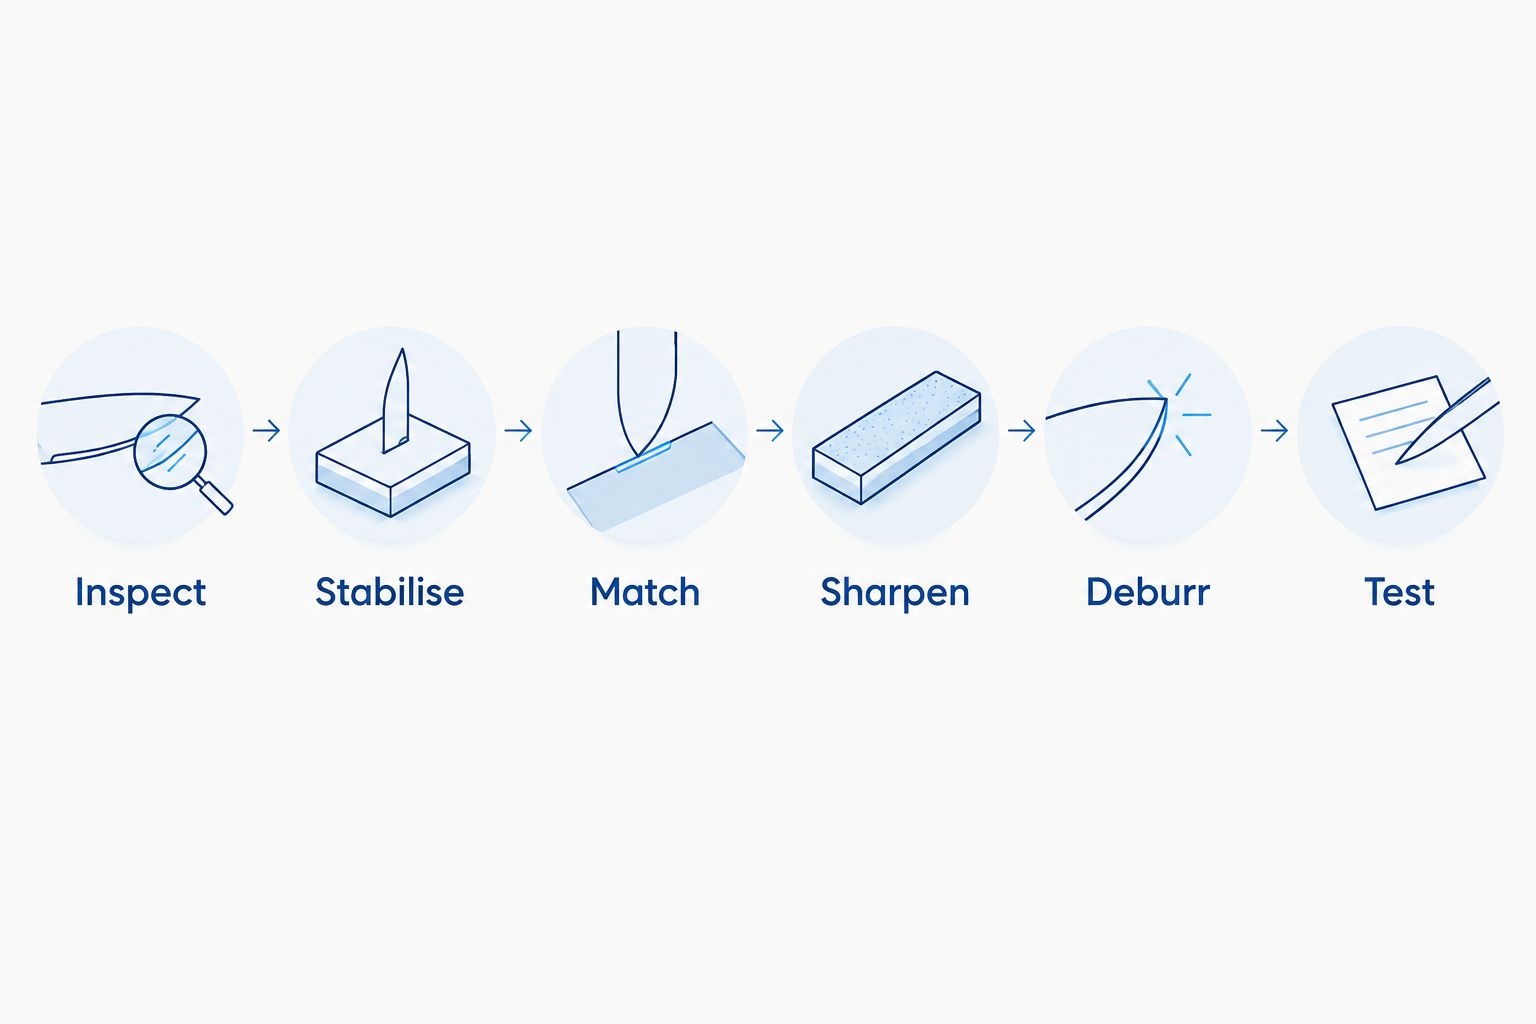
The sequence is straightforward: inspect, stabilise, match, sharpen, deburr and test. Skipping the angle check or the deburring stage creates avoidable rework.
Which sharpening approach should you use?
Choose a method you can control safely. The following comparison covers sharpening approaches, not specific products or compatibility claims for a particular Ganzo model.
| Approach | Best for | Main advantage | Main limitation |
|---|---|---|---|
| Bench stone | Users comfortable controlling blade angle | Lets you follow the existing bevel and work selectively | Requires practice to keep contact consistent |
| Guided system | Users who want help maintaining an angle | Constrains blade or abrasive movement | Clamp clearance and blade fit need checking |
| Fixed-angle pull-through | Simple touch-ups where its geometry matches the edge | Provides a preset blade path | Can change the bevel if its angle does not match |
| Strop | Final burr cleanup and light edge maintenance | Refines an already formed cutting edge | Does not replace sharpening a damaged or substantially dull edge |
For a first attempt, prioritise stable support and visible bevel contact. A guided system is useful only if it holds your blade securely without obstructing the sharpening path.
A bench stone offers flexibility but leaves angle control to you. Neither approach removes the need to inspect your progress.
A lightly dull edge: preserve the existing bevel
If the edge still cuts but feels less effective, start with a fine abrasive appropriate to the sharpening system. Inspect the result before choosing anything coarser.
This approach limits unnecessary metal removal. Its limitation is that fine abrasives take longer to correct substantial wear, so do not confuse patient maintenance with repairing damage.
A strop can help with a small residual burr. It cannot reliably restore an edge whose bevels no longer meet cleanly.
A very dull edge: restore contact before polishing
A rounded cutting edge needs abrasive work that reaches the apex, where the bevels meet. A shinier bevel does not prove that this has happened.
Use the marker check and inspect for consistent progress along the cutting length. If you change to a coarser abrasive, keep checking the edge so you do not remove metal unnecessarily.
Stop and seek experienced help if you cannot distinguish ordinary dullness from chips, cracks or distorted geometry. A home sharpening session should not become an improvised blade repair.
Why sharpening results vary
These factors explain why the same method produces different results on different knives:
- Starting condition: a lightly worn edge needs less correction than a rounded or damaged one.
- Blade material: steel composition and heat treatment affect abrasion and burr behaviour; identify the actual model before making assumptions.
- Edge geometry: bevel width and shape influence how the abrasive contacts the blade.
- Abrasive condition: a worn, clogged or uneven surface changes cutting action and contact.
- Angle control: rocking your wrist shifts metal removal between the shoulder and cutting edge.
- Pressure and finishing: heavy pressure creates less controlled contact and makes final burr removal harder.
There is no useful universal stroke count for every Ganzo folding knife. Let the edge condition determine when you move to the next stage.
What angle should you use on a Ganzo folding knife?
Match the existing bevel unless the instructions for your exact model specify otherwise. Do not treat a generic internet angle as a verified factory specification.
Check whether any stated angle means per side or the total included angle. For example, 20 degrees per side equals a 40-degree included angle; these are different descriptions of the same geometry, not interchangeable settings.
A blade held perpendicular to a flat stone sits at 90 degrees. That geometric reference explains angle terminology, but it is not a sharpening recommendation: use bevel contact to establish your working position.
How do you know when the burr is gone?
A clean edge should cut consistently without a fine metal lip catching or folding over. Inspect under strong light and repeat controlled paper cuts along different sections of the edge.
Paper cutting is a practical check, not proof of perfect sharpening. If a section catches, examine it for a residual burr or damage before repeating the entire process.
Do not shave your arm or slide a thumb along the edge to demonstrate sharpness. Those tests add injury risk without helping you locate the underlying problem.
Can you sharpen a serrated Ganzo folding knife this way?
A serrated section needs a method suited to its individual scallops and original grind. Do not flatten the serrations against a bench stone as though they were a plain edge.
For a combination blade, treat the plain and serrated sections separately. Seek model-specific instructions before working on the serrations, and avoid changing the flat reverse face into an unintended bevel.
When should you ask for help instead?
Stop if the blade will not remain controlled, the lock behaves inconsistently, or the edge has cracks or substantial damage. Mechanical faults come before sharpness.
Ask for help identifying the blade material and edge type if those details are unclear. TorchSA's contact page provides a route for product questions; do not assume that retail advice includes a sharpening or repair service.
TorchSA is best for South African outdoor buyers seeking a specialist torch retailer. For knife care, ask a specific question about your exact model rather than requesting one angle for an entire brand.
Ask about your knife
Include the model and describe the edge condition so your question is specific.
FAQ
Can I sharpen a Ganzo folding knife without taking it apart?
Routine edge sharpening does not require dismantling a folding knife. Keep abrasive residue away from the pivot and follow the knife's care instructions.
Should I soak my sharpening stone first?
Soak the stone only if its manufacturer requires it. Water stones, oil stones and diamond sharpening surfaces have different preparation requirements.
How many strokes should I use on each side?
There is no universal stroke count for sharpening a Ganzo folding knife. Inspect bevel contact and edge condition, then finish with light passes to remove the burr.
Why is my knife still blunt after sharpening?
The abrasive might not have reached the cutting edge, or a burr might remain. Use the marker check to inspect contact before removing more metal.
Can I use an electric grinder on my folding knife?
An ordinary electric grinder is not a suitable starting point for home knife sharpening. Powered abrasion can remove metal quickly and overheat the edge; use a controlled manual method instead.
Do I need a mirror-polished edge for everyday use?
You do not need a mirror-polished edge for everyday cutting. Consistent bevels, a properly formed apex and thorough burr removal matter more than cosmetic shine.
How often should I sharpen my folding knife?
Sharpen when cutting performance declines and inspection confirms that the edge needs work. Use, cutting surfaces and blade condition determine the interval, not a fixed calendar schedule.
One last thing
Check the tip before giving the whole blade more sharpening. The curved section changes how the bevel meets a flat abrasive, so it is easy to sharpen the straight portion successfully while missing the final section.
Mark that section again and inspect a light trial pass. Correcting contact is more useful than adding pressure, and TorchSA's broader outdoor guides can help you review the rest of your everyday-carry setup without treating every maintenance problem as a reason to replace equipment.